Calendar

March 2024
M T W T F S S
 123
45678910
11121314151617
18192021222324
25262728293031

Categories

Active supporter of WikiPedia
Support Wikipedia

Geocaching

Profile for uwezi

Repairing a Samsung Syncmaster 913TM

Samsung Syncmaster 913TM with its unique swiveling stand

Samsung Syncmaster 913TM with its unique swiveling stand

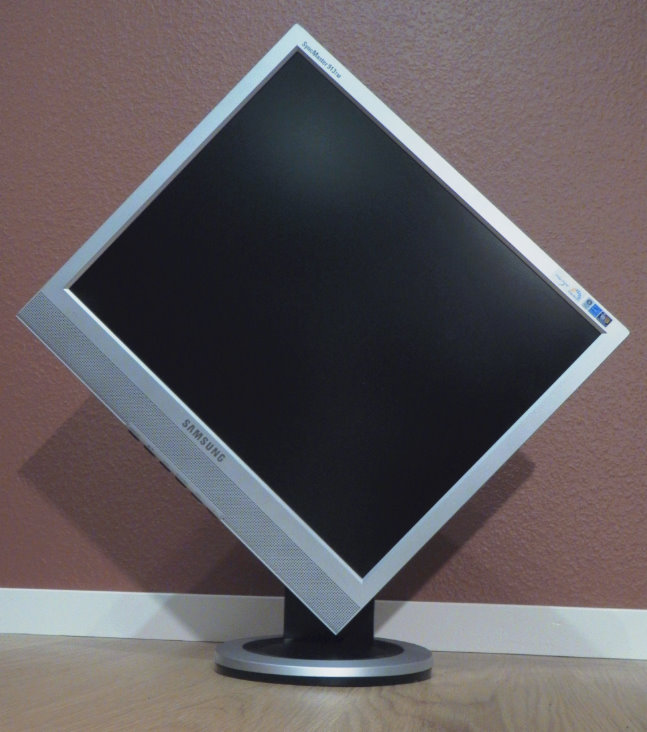
I recently got hold of another broken Samsung monitor. This time it is a Syncmaster 913TM which is characterized by its swiveling stand, which allows the screen to be rotated by 90 degrees. I would not call this “portrait” as opposed to landscape, because of the screen’s almost square aspect ratio of 5:4.

Connecting power to the screen let the green power LED light up for a brief moment, before it went dark again – no other signs of life. Diagnosis: possibly a set of blown electrolytic capacitors in the power supply. This appears to be a general design flaw of electronics from the past decade.

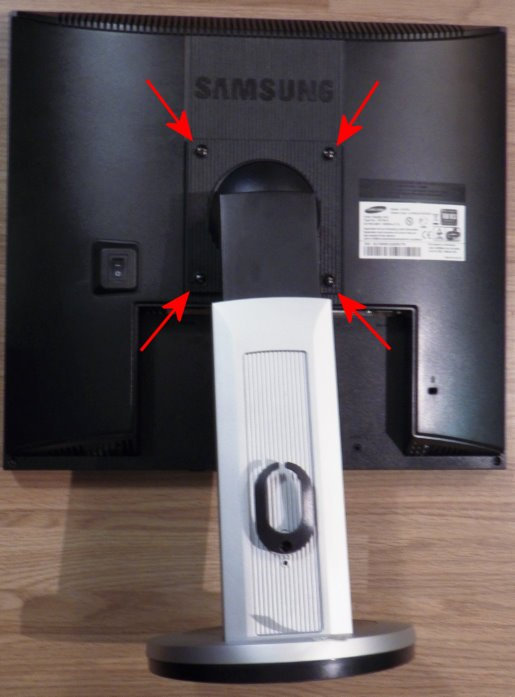
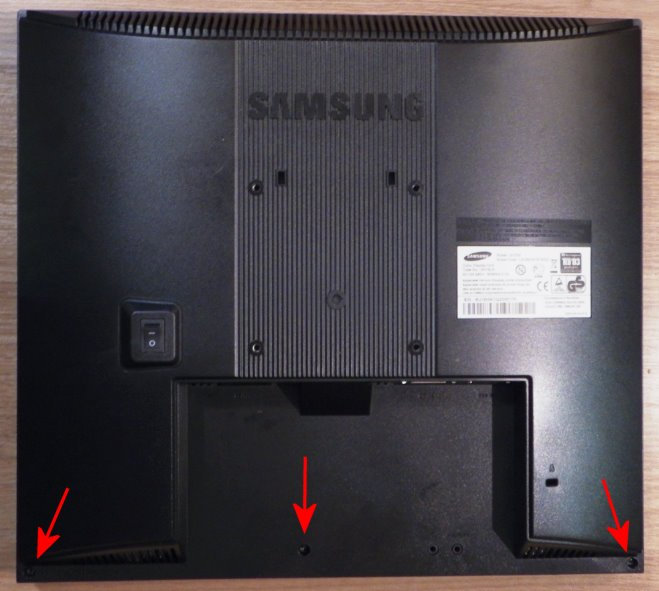
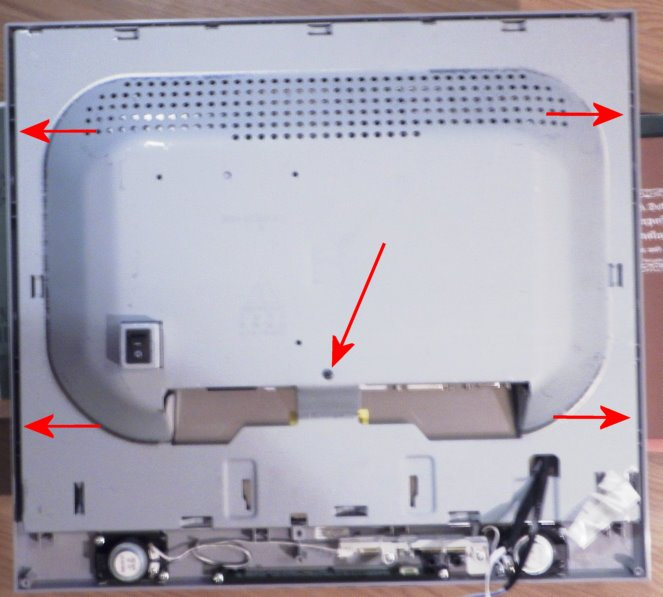
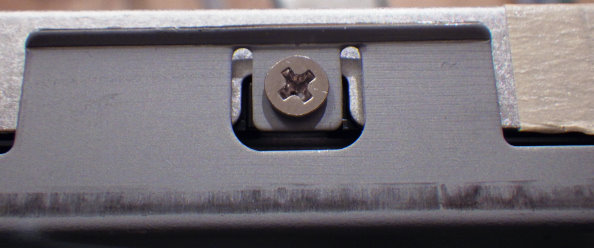
Opening the Syncmaster 913TM is straight forward – the back is secured with a group of screws and the monitor itself makes a mechanically stable and solid impression.

The stand is mounted with 4 screws to the back of the screen.

The stand is mounted with 4 screws to the back of the screen.

The plastic back cover is secured with 3 screws at the lower edge and a couple of plastic hinges around the other sides.

The plastic back cover is secured with 3 screws at the lower edge and a couple of plastic hinges around the other sides.

The electronics is protected by a solid metal cage. This cage is mounted with 4 screws at the left and right side and one screw in the center.

The electronics is protected by a solid metal cage. This cage is mounted with 4 screws at the left and right side and one screw in the center.

You have to lift the metal frame out of the plastic bezel to reach the screws on the sides of the screen.

You have to lift the metal frame out of the plastic bezel to reach the screws on the sides of the screen.

Unplug the cables which connect the front panel buttons and the speakers.

Unplug the cables which connect the front panel buttons and the speakers.

Underneath the metal cage there are two circuit boards mounted: to the left the power supply on a phenolic single layer board, to the right the controller board on a multilayer FR4-board.

Underneath the metal cage there are two circuit boards mounted: to the left the power supply on a phenolic single layer board, to the right the controller board on a multilayer FR4-board.

Zooming in on the power supply you can see the backlight inverter to the left and the power supply for the rest of the screen to the right. In the upper right corner there is a suspicious electrolytic capacitor.

Zooming in on the power supply you can see the backlight inverter to the left and the power supply for the rest of the screen to the right. In the upper right corner there is a suspicious electrolytic capacitor.

Yes, this capacitor is blown. The top is extended and some of the electrolyte has leaked out. It is a 1000µF/16V capacitor.

Yes, this capacitor is blown. The top is extended and some of the electrolyte has leaked out. It is a 1000µF/16V capacitor.

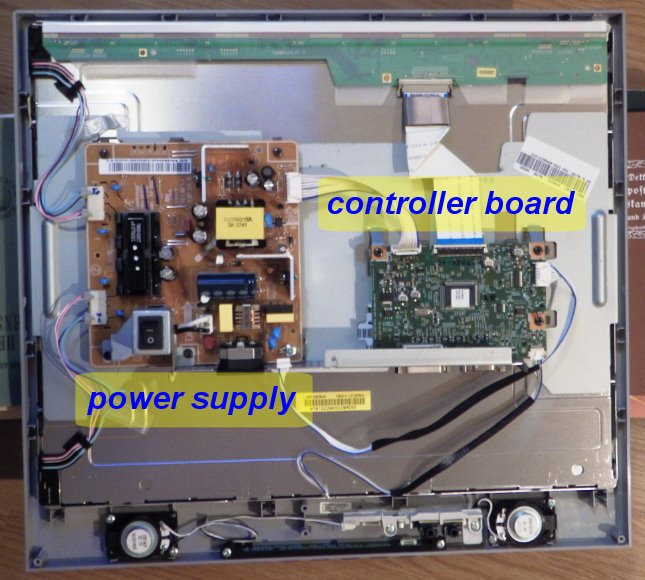
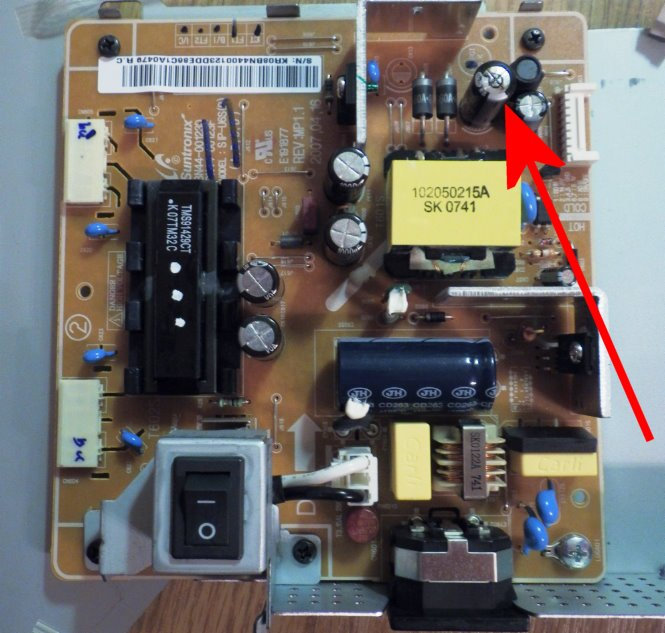
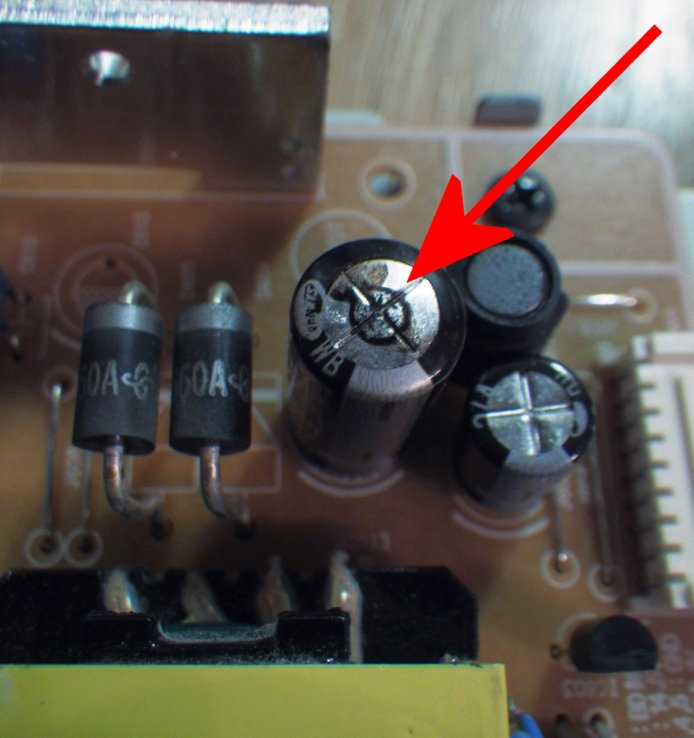
I replaced the broken capacitor with a new 1000µF/16V 105°C, screwed everything together again and ended up with a nice working monitor!

1 comment to Repairing a Samsung Syncmaster 913TM

Leave a Reply


You can use these HTML tags

<a href="" title=""> <abbr title=""> <acronym title=""> <b> <blockquote cite=""> <cite> <code> <del datetime=""> <em> <i> <q cite=""> <s> <strike> <strong>